Working on a few projects right now and one of them involves the I phone 5, which I do not currently have in my possession. Not sure when or if ever...
So like most things around here if I don't have it might as well make it, and make it out of wood.
Jumped on the 'ol intro-net thing surfed around for a few and gots me the dimensions of the #5 and went to town on some old wooden fencing. A little elbow grease and we have a fine example of a modern convenience without all of the convenience and technologies.
No calls, no web surf'n, no instagram. just wood.
More on the purpose later.
Well back to it...
Hope your week has been productive and positive....
If you are back east "god's speed" and we have you in our thoughts and wish you well.
>>>--"Keep On Crow'N--->
Cheers,
'MrRay'
Showing posts with label Craft. Show all posts
Thursday, November 01, 2012
Thursday, October 25, 2012
Let's Do Some Wax'n
In having a go with a few projects and ideas involving fairly common goods it is sometimes a challenge to come up with items that are unique, have a voice, and stand apart while still being able to move about nicely in, out, and around the "crowd".
It is while dabbling in the is idea that the though occurred to me recently to have a little mess about with fabric and wax. Now this is not anything new by any means, but the end use is part of the overall story telling that I think might be quite fun when all said and done. More on that on a later date...
It has been a while since I have done any kind of Process post up. So figured share a bit on some building of a bar of wax for rubbing into some fabrics with.
Materials needed:
-2 Pots: 1 that fits loosely inside the other to do a little double boiler action. (You don't want to melt wax directly over an open flame it could end very badly with flames and such) Or if doing a small batch could use an old soup can inside a pot.
-Water: to boil in mentioned pot.
-Stove Top: how else you going to boil the water?
-Wax: paraffin and Bee's
-Coconut Oil (optional): Smells nice and for my projects fits in with the whole story thing mentioned above. Also it helps keep the wax soft and pliable for use and adds a little bit "grease" for end use.
-Container or Mold: Use to poor the melted wax into to set up as the bar. I used an old 32oz. plastic yogurt container.
-Food/Kitchen Scale: To measure out the right amount of wax to mix together. If you don't have one, no worries this is not chem. class it does not need to be perfect.
-Wood or Metal Spoon: To stir the wax as it melts.
Recipe:
2 part Parraffin
1 part Bee's
A few heaping Table Spoons or 1 part Coconut oil (optional)
Bash up your wax into small chunks and measure it out into your smaller pot or soup can. My blend for this round, 8oz. Paraffin / 4oz. Bee's.
Put a shallow amount of water in the larger pot and place the smaller pot / soup can with the wax chunks into the pot and fire up the burner on the stove.
Low to Medium heat a n bring to a soft boil (not rolling just a few bubbles) As the water is warming up the chunks of wax will start to soften and melt down as well. Once the wax starts to melt you can begin to stir to help melt down the wax.
Once all the wax is melted and in a liquid form remove from heat and add the Coconut Oil by stirring it into the liquid wax until dissolved completely.
Remove small pot or can from the larger pot with togs or oven mit (caution HOT) and poor liquid wax into mold or plastic container and let set for a few hours or over night.
Once fully set, and if you are using a plastic container, like the yogurt container, you need to work the edges to loosen it up and it should, after some working it a bit, pop out. Now youz got a nice bar of wax for some fabric waxing fun.
Stay tuned for the next post, Elbow Grease and hot iron fun...
Back to it.
>>>--"Keep On Crow'N--->
Cheers,
'MrRay'
It is while dabbling in the is idea that the though occurred to me recently to have a little mess about with fabric and wax. Now this is not anything new by any means, but the end use is part of the overall story telling that I think might be quite fun when all said and done. More on that on a later date...
It has been a while since I have done any kind of Process post up. So figured share a bit on some building of a bar of wax for rubbing into some fabrics with.
Materials needed:
-2 Pots: 1 that fits loosely inside the other to do a little double boiler action. (You don't want to melt wax directly over an open flame it could end very badly with flames and such) Or if doing a small batch could use an old soup can inside a pot.
-Water: to boil in mentioned pot.
-Stove Top: how else you going to boil the water?
-Wax: paraffin and Bee's
-Coconut Oil (optional): Smells nice and for my projects fits in with the whole story thing mentioned above. Also it helps keep the wax soft and pliable for use and adds a little bit "grease" for end use.
-Container or Mold: Use to poor the melted wax into to set up as the bar. I used an old 32oz. plastic yogurt container.
-Food/Kitchen Scale: To measure out the right amount of wax to mix together. If you don't have one, no worries this is not chem. class it does not need to be perfect.
-Wood or Metal Spoon: To stir the wax as it melts.
Recipe:
2 part Parraffin
1 part Bee's
A few heaping Table Spoons or 1 part Coconut oil (optional)
Bash up your wax into small chunks and measure it out into your smaller pot or soup can. My blend for this round, 8oz. Paraffin / 4oz. Bee's.
Low to Medium heat a n bring to a soft boil (not rolling just a few bubbles) As the water is warming up the chunks of wax will start to soften and melt down as well. Once the wax starts to melt you can begin to stir to help melt down the wax.
Once all the wax is melted and in a liquid form remove from heat and add the Coconut Oil by stirring it into the liquid wax until dissolved completely.
Remove small pot or can from the larger pot with togs or oven mit (caution HOT) and poor liquid wax into mold or plastic container and let set for a few hours or over night.
Once fully set, and if you are using a plastic container, like the yogurt container, you need to work the edges to loosen it up and it should, after some working it a bit, pop out. Now youz got a nice bar of wax for some fabric waxing fun.
Stay tuned for the next post, Elbow Grease and hot iron fun...
Back to it.
>>>--"Keep On Crow'N--->
Cheers,
'MrRay'
Monday, September 19, 2011
Cover That Point.
As we have slowly settled into our current abode it has take'n me ages to get the shop space set up. I recently cleared a few more boxes and have set up the ol industrial. Late last night on a whim I decided that I need to have a cover for my scisors in my kit bag.
Busted out a ruff pattern.
Fired up 'MsGreen' and proceeded to build a leather cover for them scissors.
It feels good to build something from idea to finished product all in one go.
So often than not an idea is sketched out. A pattern or two built. Construction begins and then things get left in various state of completion as life steps in and does it's thing. Not this project.
Also stoked to finally have a little work space built out to help get some of those silly ideas out and into projects....
Hope your weekend was a good one and that your week is starting out on a good foot.
"Remember the Golden Rule"
Cheers,
'MrRay'
Busted out a ruff pattern.
Fired up 'MsGreen' and proceeded to build a leather cover for them scissors.
It feels good to build something from idea to finished product all in one go.
So often than not an idea is sketched out. A pattern or two built. Construction begins and then things get left in various state of completion as life steps in and does it's thing. Not this project.
Also stoked to finally have a little work space built out to help get some of those silly ideas out and into projects....
Hope your weekend was a good one and that your week is starting out on a good foot.
"Remember the Golden Rule"
Cheers,
'MrRay'
Tuesday, July 26, 2011
Weekend Build: Surf Sign
Now that the 'ol work bench is built and I have a place to start making messes again I decided to have a go with some more wood work. This time making some signage. Now this is a long post because I took heaps of images through out all of the steps of the build. From paper pattern cutting...
...all the way to being hung in the office at the 9-5er.
This is also my first go at shooting everything with my phone camera. Not the best images but good enough to share the building process.
So started out with the idea a while back and finally got around to going after it by finding a good font that I liked. Printing out nice and big on 11x17 paper and cutting em out for a templet to follow.
I have a bunch of plywood around the new home that has been out in the yard for a few years by the looks of it. This is the base for the letters and the layout. Did the layout to follow the grain of the wood so when I comes time for sanding and paint and whatnot it will work nicely.
After all ruffed on the wood got out the trusty scroll saw and clamps and went to town.
...all the way to being hung in the office at the 9-5er.
This is also my first go at shooting everything with my phone camera. Not the best images but good enough to share the building process.
So started out with the idea a while back and finally got around to going after it by finding a good font that I liked. Printing out nice and big on 11x17 paper and cutting em out for a templet to follow.
I have a bunch of plywood around the new home that has been out in the yard for a few years by the looks of it. This is the base for the letters and the layout. Did the layout to follow the grain of the wood so when I comes time for sanding and paint and whatnot it will work nicely.
After all ruffed on the wood got out the trusty scroll saw and clamps and went to town.
Wednesday, June 22, 2011
Motor Boat'n
Surfing, like most things these days, is followed by folks that are "doing their own thing"..... just like everybody else.... Well Mr. Brian Bent truly is doing his own thing!!! If you know anything about wave sliding then you know that a "kook box", or anything of the sort, is not something you see much of in museums let alone actually out in the waves being ridden.
A true example of going out finding what you love and just having a go with it for nothing else but personal stoke! Thanks to JJ for sharing with me about the gig with United 50. which reminds me, to see more of Mr.BB check out his little Sunday gathering, Hot Rod Church for Sinners.
"Cheers"
Thursday, September 02, 2010
R/Co. Project: Wood Block Printing
Time is fast approaching for the runway show so instead of packing snuck in a late night fabric printing test run with the compleated wood block.
The collection of goods that I am planning to send down the runway involves headwear that is built from a nice washed out navy canvas so I want the print to match back to that color. I do not have navy ink so did it the old fashioned way and just mix it up by hand.
Got out some fabric screen printing ink that I have been meaning to use, eye balled it and went for it. A little blue, a dollop of black, a touch of red, some more blue and a touch more black and.... looks good to me (for some reason color theory dose not click in my head but if I just mess with it for a bit it somehow works out)
The hardest part about block printing fabric is getting a nice transfer onto the fabric. Smaller blocks seam to do better but that is not what we are going for here so...
Laid out some ink onto a large plate glass and rolled the brayer through it and gave the block a nice good coat of ink.
The collection of goods that I am planning to send down the runway involves headwear that is built from a nice washed out navy canvas so I want the print to match back to that color. I do not have navy ink so did it the old fashioned way and just mix it up by hand.
Got out some fabric screen printing ink that I have been meaning to use, eye balled it and went for it. A little blue, a dollop of black, a touch of red, some more blue and a touch more black and.... looks good to me (for some reason color theory dose not click in my head but if I just mess with it for a bit it somehow works out)
The hardest part about block printing fabric is getting a nice transfer onto the fabric. Smaller blocks seam to do better but that is not what we are going for here so...
Laid out some ink onto a large plate glass and rolled the brayer through it and gave the block a nice good coat of ink.
Monday, July 12, 2010
R/Co. Project: Hanger
For some reason I am just never satisfied with what you can go out and buy so like most things pertaining to what we are doing with REDCROW it is only natural that instead of using readily available hangers I had to go off and build some....
A long piece of 3/4" thick wood, a skil saw, a wood rasp, sandpaper and not enough time on my hands and we are ready to go to work late into the night...
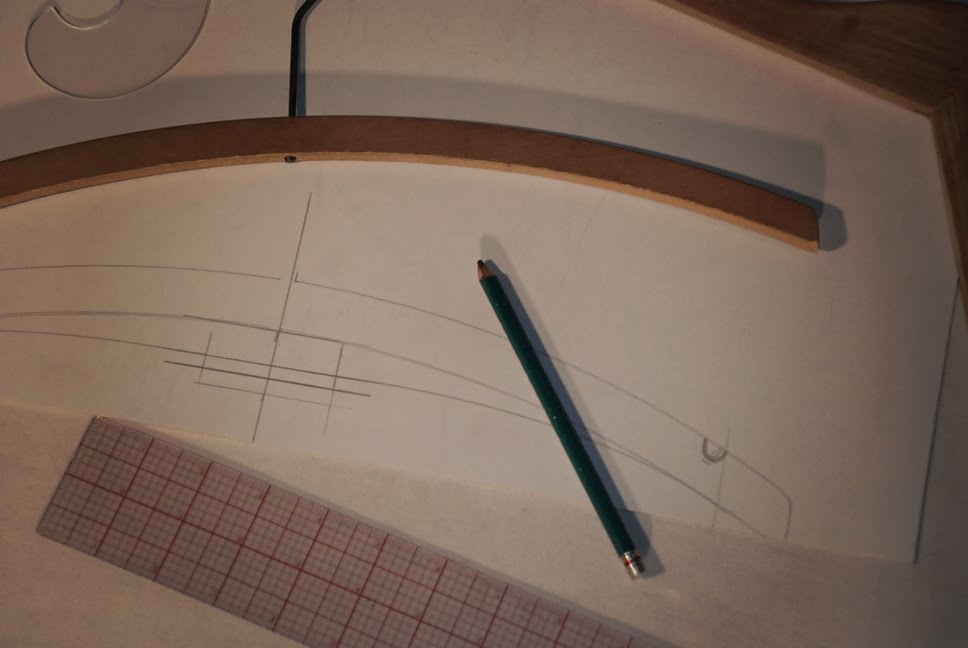
Have this old wooden hanger that I like so decided to start there for a pattern to build from. Of course made a few modifications to fit what I was after.
Sketched it out on a scrap of Oak Tag and was ready to go.
Lay out the pattern on the wood.
A long piece of 3/4" thick wood, a skil saw, a wood rasp, sandpaper and not enough time on my hands and we are ready to go to work late into the night...
Have this old wooden hanger that I like so decided to start there for a pattern to build from. Of course made a few modifications to fit what I was after.
Sketched it out on a scrap of Oak Tag and was ready to go.
Lay out the pattern on the wood.
Saturday, May 01, 2010
R/Co. Project: Seeing Dots.
Man Friday morning just sucked big time. My alarm goes off way to soon, like it always does, and as I go to get out of bed the room just starts spinning... After a few attempts to get out of bed I throw in the towel and close my eyes and wait for it to stop. At one point I my bladder was so full that I had to get up and try to get to the bathroom. I made it ok but ended up falling into the tub and missed the toilet compleatly. So the whole day was a waste. I have so much that I need to get done, both at the 9-5 as well as what I want to get done out in the garage. Spending a day in bed because the world won't stop spinning when I get up is just not needed....
Anyway, for the last while the daily routine has been get up get ready for the day, go to the 9-5, come home do the family thing, and then out to the garage till the wee hours of the morning, then repeat.
Well for the last 3 days of this routine I have been out making dots...
Yep, a whole mess load of dots.
Part of this little project I am building involves a shirt that is a navy blue ground with an allover dot pattern. Since I could not find exactly what I wanted for fabric I decided I would just have to make it....
Silly me. I don't think I will be making more than 1 and this is why....
Anyway, for the last while the daily routine has been get up get ready for the day, go to the 9-5, come home do the family thing, and then out to the garage till the wee hours of the morning, then repeat.
Well for the last 3 days of this routine I have been out making dots...
Yep, a whole mess load of dots.
Part of this little project I am building involves a shirt that is a navy blue ground with an allover dot pattern. Since I could not find exactly what I wanted for fabric I decided I would just have to make it....
Silly me. I don't think I will be making more than 1 and this is why....
Sunday, March 21, 2010
R/Co. Project AW10:Chop n' Pound.
The sound of hammering has been filling the chilly early spring nights here in the REDCROW garage in the Great Pacific Northwest. I am working on a few ideas that I have been wanting to try for some time now. One is for a print that involves a pattern, some hole punches, and a hammer. This is to build the stencil. Then some fabric, wax and fabric dye to make the print.
Not sure if it is going to actually work. But the stencil has been pounded out and the dye has been purchased. So now to get dirty and see how it goes....
The chop of the fabric shears have been mixing in with the pounding to cut up the latest obtained fabrics.
Cheers.
Saturday, July 26, 2008
Hang It With a Strap.
This time away from a standard 9-5 has given me chance to get back into a few of the things that I enjoy or would like to do more of. While at work on a few occasions I would spend lunch brake viewing and learning about banjo playing from the daily frail master himself Patric over at Tangier Sound. Now I can actually spend time learning and play along with it were at work I just watched and that was that.... Anyway, so I need to get myself a banjo strap and since I no longer have spare change available cause of the current circumstance I had to do what I preach to "fix it up, wear it out, make do, or do without" so I happened to clean out my closet and was getting rid of a few belts and it came to me to just make a strap and of course I have a few good ones to choose from so I had to make more than just one....
I decided that I must use this one... I think I will name the ol' banjo 'lil miss Earl'
here is the second one I made I just liked the ornate work on the belt so it was hard to pass up.
Detail* I decided to use jute twine as an accent detail on the leather ties that I used to hold the strap to the banjo. I like how it gives it a bit of a rustic detail. Good Fun!
And now she hangs on her own.
I decided that I must use this one... I think I will name the ol' banjo 'lil miss Earl'
here is the second one I made I just liked the ornate work on the belt so it was hard to pass up.
Detail* I decided to use jute twine as an accent detail on the leather ties that I used to hold the strap to the banjo. I like how it gives it a bit of a rustic detail. Good Fun!
And now she hangs on her own.
Tuesday, January 08, 2008
Hold Tight.
Just wanted to share a bit more of the Tie Project that I did for Christmas.Here is a picture of the tie clips that I made with 14 gage wire that I bent and shaped into an old fashioned style safety pin. I then made a distressed RCo. logo plate that hangs from the bottom of the clip. I will share more pictures and more of the tie project later.
Subscribe to:
Posts (Atom)